
Best RV Campsite Setup Ideas for Your Teardrop Trailer
Are you new to RVing? Wonder what you need to purchase for your campsite to make it comfortable?
You have come to the right place! After several years of tent camping, John and I had acquired quite a few things for our campsite setup.
But after purchasing our Teardrop Trailer, it was time to reconfigure everything.
That meant more shopping!
But after spending the money on the trailer, we really didn’t want to rush into any major purchases that we wouldn’t end up using.
So we have put together this list of our top recommendations for campsite setup ideas for your Teardrop Trailer (or any RV for that matter).
Choosing the Perfect Campsite
Before we get into the actual items for your campsite, we though it would also be relevant to talk about the actual ideal campsite.
Since we prefer staying in Ontario Provincial Parks, our criteria may be a little different than others who prefer staying in private campgrounds.
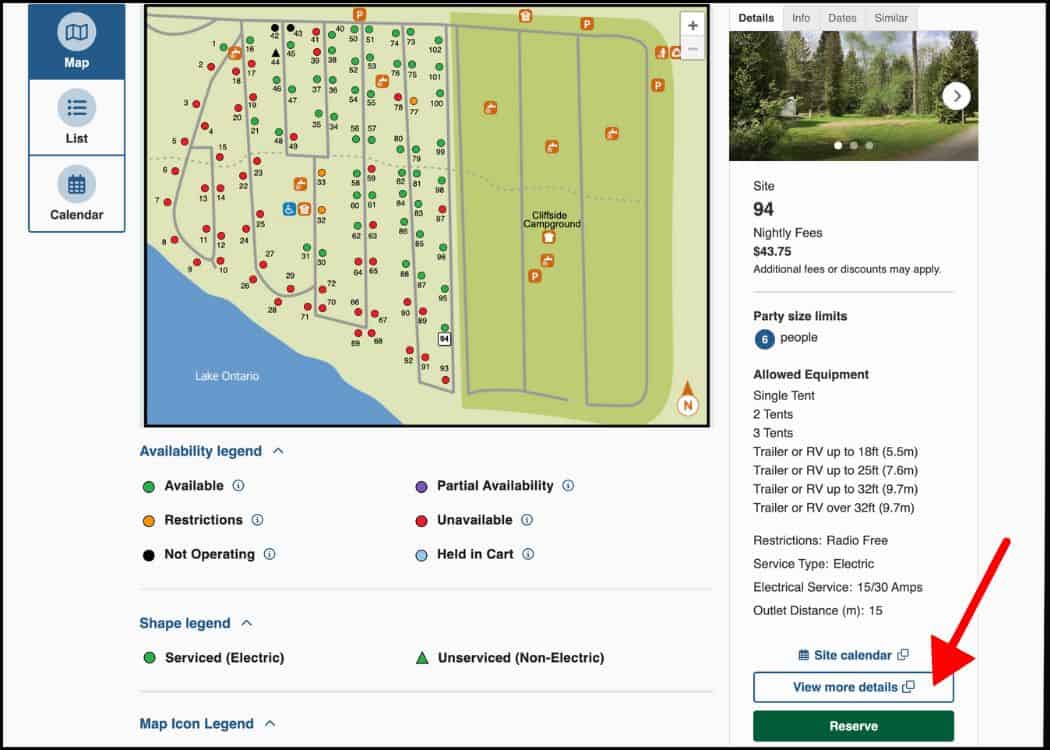
When we book through the Ontario Parks reservation system, we make sure to look at the photo of the site, as well as all the details (i.e. pad slope, shade, obstructions, distance to electrical outlet, etc).
And while our 18ft Teardrop can fit into most sites, we still want to make sure that we won’t have any problems getting into the site, as we did at Bruce Peninsula National Park.

At that park, the driveway to our site was quite narrow, and we had trouble making the turn because of the trees that were along the parking pad.
This was not obvious in the site photos, so we were caught off guard when we arrived (just before dark too).
But we managed, with the help of some friendly neighbours.
Arriving at the Campsite
Once we arrive at the campsite, I always get out and take a look at our site before John even starts backing in the trailer.
I look for any potential obstructions like trees, stumps, overhanging branches, or even flooded areas.
I then look for the most level spot to park the trailer.
I also consider where the electric post is, where the fire pit is, and where I will want to put our dining tent.
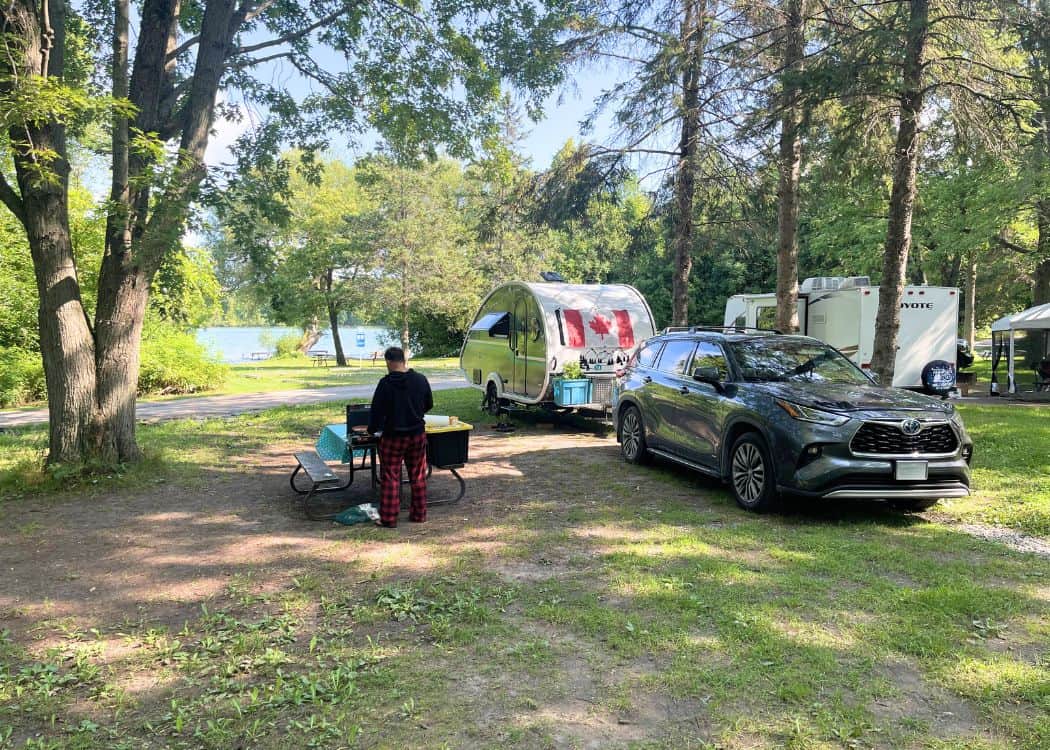
Lastly, I consider where the neighbours are parked (or will potentially be parked).
If our site is very open and there is very little barrier between us and the neighbours, then we try to position our trailer to maximize our privacy.
We also try to leave space between us and the neighbours, as a courtesy.
Essential Gear for a Great Setup
There are a few things that you will definitely need as a new RVer, and then things that are nice to have.
The Basics
I just want to very briefly touch on the things that you will really need when camping with your Teardrop or other RV.
Things like stabilizer blocks, levelling blocks, electrical cords, surge protectors, water and waste hoses, and basic tools are all must-haves when heading out on your first trip.
We actually have a really great post that breaks down all the necessary equipment that you will need when camping with a Teardrop.
Our Absolute Must-Haves
Once you have all the important basic stuff, you can move on to the fun stuff.
We recommend heading out in your camper for a few trips and see what you really need.
Don’t make the mistake of going on a shopping spree before your first few camping trips, only to realize that you won’t use half the stuff that you bought.
In our opinion, the bare minimum that we have for our campsite setup, is an outdoor rug, dining tent, chairs, and awnings to cover our windows.
Outdoor Rug
You will find this to be super helpful for lessening the dirt that gets dragged inside your camper.

It’s one of the first things that goes down on our site. What size you get, depends on you.
Ours is big enough to cover the space in front of our door, and have room to put a small table and chairs on it.
Dining Tent
This was something that we purchased in our second year of camping. But to be honest, we should have gotten one sooner!
Our dining tent is large enough to fit a large picnic table inside, and still have room to move.
It also comes with a bug screen, has an easy folding steel frame, and is made from water-resistant fabric. We love it!

It has come in handy keeping the bugs out during the spring and early summer. And also keeping us dry when the weather wasn’t cooperating.
In the fall when the bugs are all done, we don’t bother using the bug screen, just the canopy.
It’s also great to keep the sun off you if you don’t have a lot of shade on your site.
Just be aware of windy days! Ours was pulled out of the ground and warped by a huge gust of wind.
Awnings
Because our model of Teardrop did not come with a built-in retractable awning, we had to find other solutions for shade.
While some Teardrop owners prefer a side tent or sunshade that fits right into their Keder Rail, we prefer simple window coverings/shades.
We had our shades custom-made (small business on Etsy) during our second year of camping with our Teardrop.

We realized pretty quickly that while we have blinds inside, I like to have the window open for a breeze and some fresh air.
The shades provide us with both shade and privacy and are easy enough to put on (except for our rear Stargazer window – that one’s a bit of a pain).
The first year, we made do with our Canadian flag as a window shade. Patriotic AND it did the job!
🦟 Pro Tip – Don’t forget a bug zapper! We put one inside the corner of our dining tent so that we could eat in relative peace. Ours plugs in, but you can also get a rechargeable one.
Comfortable Outdoor Living Space
The next few things on our list are must-haves for us as well. But if you were a tent camper, you most likely already have these items.
These pieces of outdoor furniture not only make your campsite comfortable but also make it feel like a place to relax.
Chairs
While most campsites come with at least one picnic table to sit at, most people are going to want to sit around their campfire in a comfy seat.
During our first year of camping with our trailer, we made do with folding camp chairs we had used while tent camping.

They folded down small enough but were not the most comfortable.
For our second year of camping, we upgraded to proper chairs with small side tables and pockets attached. These were perfect and definitely more comfortable.
Now, we have seen some pretty fancy chairs with high backs that recline in other people’s campsites, but those were a little too pricey (and took up too much space) for us.
Small Folding Tables
John and I have two small folding tables that we used during our first year camping. They came in quite handy while having dinner by the fire.
Now that our camp chairs have built-in tables, these extra folding tables come in handy for other things.
For one thing, we always have one next to the camper door.
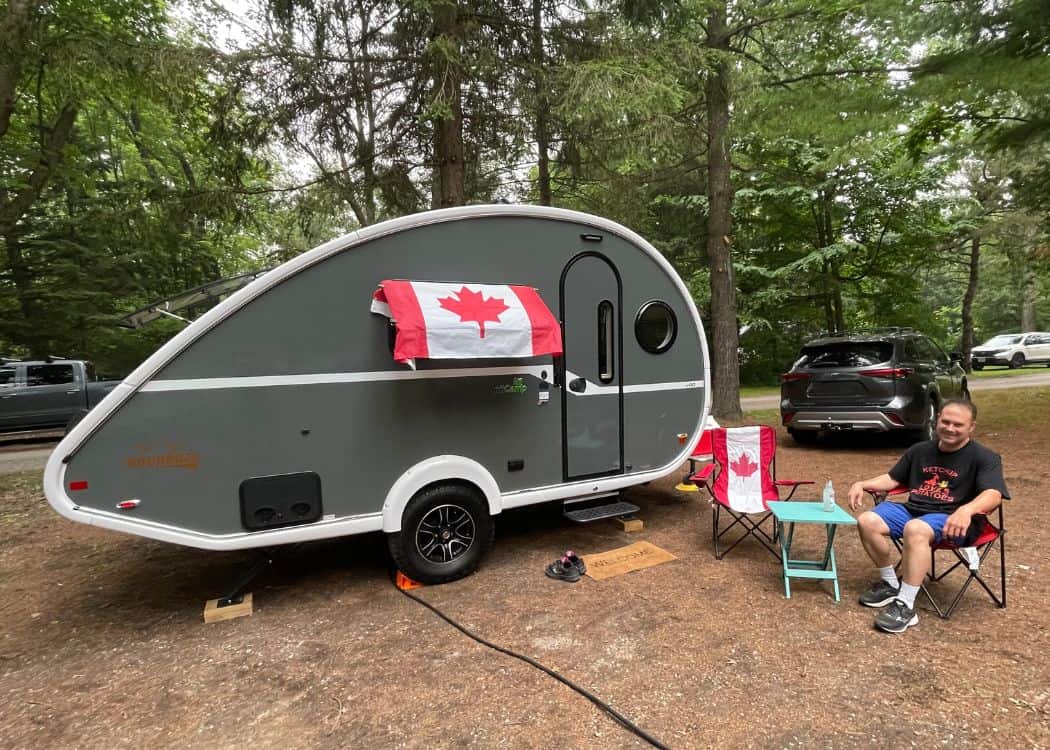
We use it for putting dishes or food on, during meal prep, or after dinner when we are getting ready to put things back into the trailer.
The kids also use a table next to the hammock to put their snacks and other miscellaneous items on (see below).
Hammocks
A hammock is my younger daughter’s must-have.
If there are well-placed trees on our site, you can bet that the hammock is going up!

While the rest of us are out hiking, you can find our daughter snuggled up in the hammock, listening to music, reading her book, and of course, cat-napping (she is a teen after all).
Our hammock folds up nicely into a small attached pouch (that acts as a convenient pocket for your phone), making it easy to throw in our camping bin.
Outdoor Lighting
Last on our list for this category is outdoor lighting.
Lights make the campsite feel cozy at night while lighting things just enough for you to move around safely.

The good news is, that they come in a variety of colours and forms. From string lights to neon to patio lanterns and even solar-powered stakes, it all depends on what you like.
We started with a set of twinkle lights that we already had at home. They were not the easiest to string up and were a little too bright for our liking.
During our second year of camping with our trailer, we found the perfect neon lights.
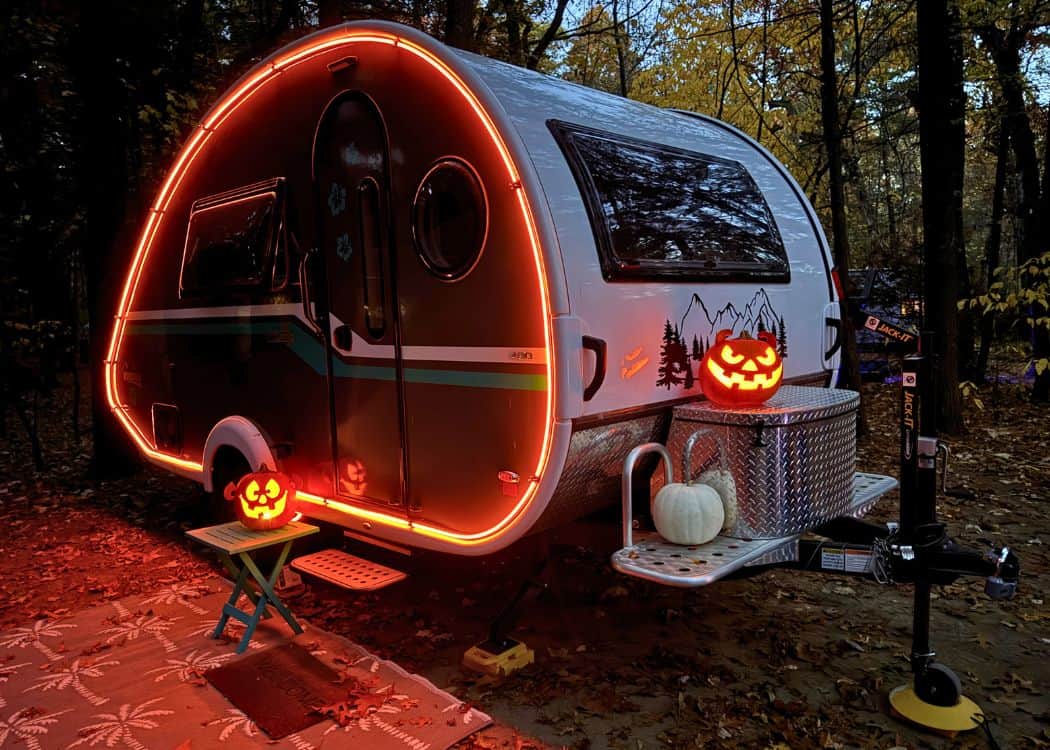
The lights actually slide neatly into our Keder Rail and are held in place by a few binder clips.
Not only that, but the one set of lights comes with a remote to change the colour! I LOVE that!
John and I can usually get them up in less than 5 minutes.
Kitchen and Cooking Area Setup
How you set up your cooking/outdoor kitchen area is pretty important.
A lot of this setup depends on your rig, what kind of cook/camper you are, and how fancy you want to get.
Kitchen
Your outdoor kitchen can be as simple or as extravagant as you would like.
If your Teardrop (or other rig) actually comes with a built-in outdoor kitchen, then you are pretty much set.
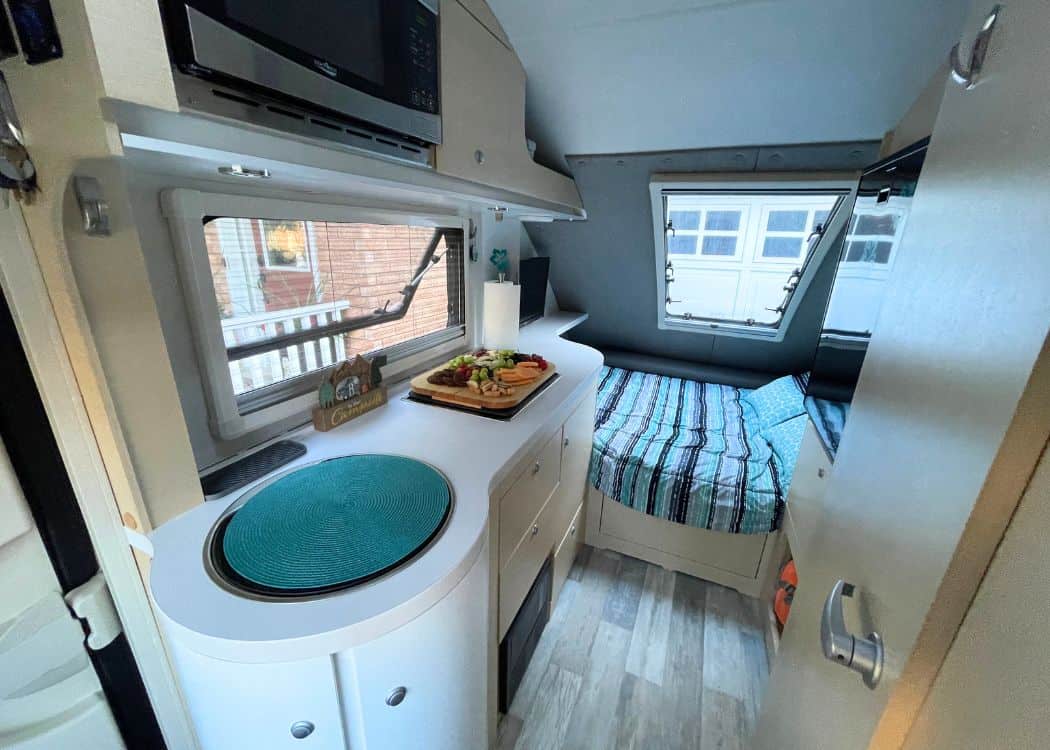
Our Nucamp TAB 400 does not. Our kitchen is inside. So we actually split our cooking between inside and outside, depending on the meal.
Inside, we have the basics (fridge, gas stove, microwave). We also have a small coffee maker, crock pot, waffle maker, Omnia Oven, and Moka pot.
We have a full blog post about all of our galley essentials if you need some ideas.
Outside, we use our Coleman gas stove and a small hibachi.
We use two large collapsable buckets and a collapsable dish drainer to wash our dishes outside, as the sink inside our camper is pretty small and shallow.
While we like to be adventurous with our cooking, we tend to base our dinners on what tools we have available.
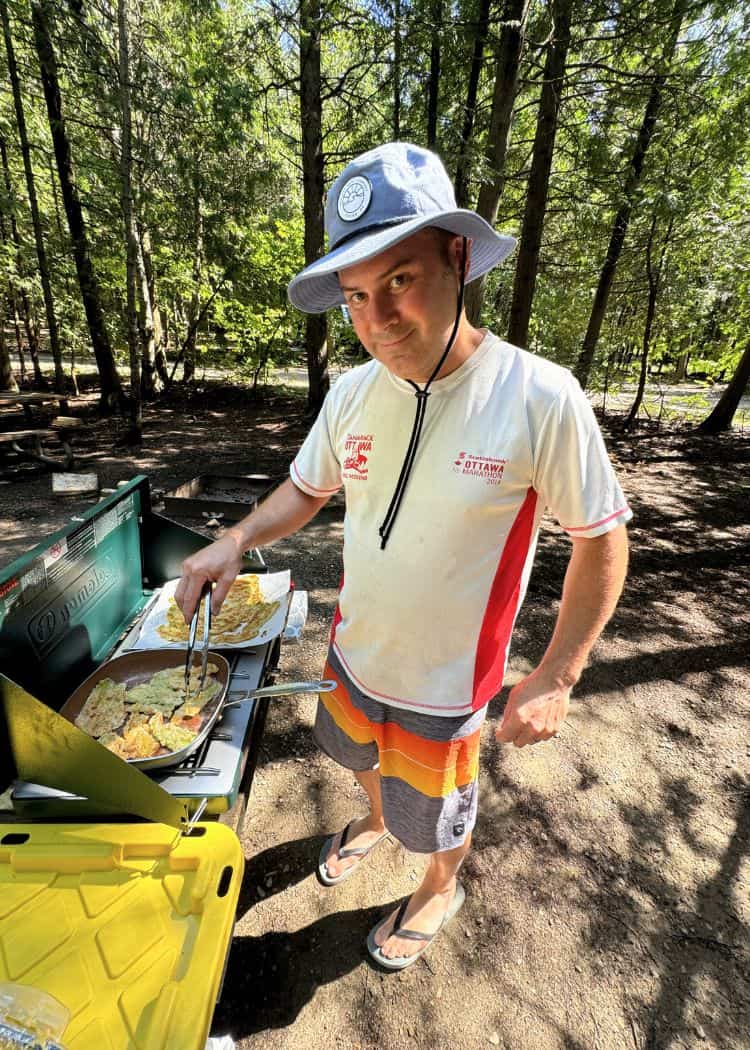
That hasn’t stopped us from having full Thanksgiving dinners at our campsite for the past 3 years!
We have seen other campers with blenders, pizza ovens, large BBQs and even a rotisserie sitting in their outdoor kitchens. Awesome, right?

Foldout Tables
Aside from our 2 small foldable tables, this is one thing that we actually do not have. We have just never felt it was necessary.
We just use the picnic table to set everything up. Because most picnic tables in the provincial parks are oversized, we have plenty of room.

That said, we have seen many people set up a folding table alongside their rig, so as to make use of the electrical outlet.
This is where we see all the fancy appliances lined up!
And since many of the larger rigs (and other brands of Teardrops) have built-in awnings, this makes sense and would be super convenient.
Practical Storage Solutions
I love storage solutions! Having a way to keep everything neat and tucked away makes me happy.
This is especially true when you are camping in a tiny Teardrop! Space is definitely at a premium.
In fact, we have written an entire blog post about storage solutions for your Teardrop.
Outside Storage
So, because inside storage is minimal in a Teardrop trailer, we are forced to keep a lot of our things in storage containers that we carry in our tow vehicle.
What we have come up with to make things really easy for us, is to have 2 large (labelled) containers that are waterproof for all of our outdoor gear.

One contains everything we need for our outdoor kitchen including our stove, BBQ utensils, tablecloths, small propane canisters, extra paper towels, etc.
The second bin contains our miscellaneous items like our outdoor lighting, lanterns, bug zapper, hammock, extra tarps, a clothesline, clothes pins, etc.
Other Outdoor Storage
Another place where we store outdoor items is in the small ‘garage’ under Nellie.
As you can imagine, this area is not very big. But it is the perfect place to hold all of our chocks, stabilizer pads, revellers, water hoses, electrical cords, and tools.

Fortunately for us, Nellie also has a large bin mounted on her tongue.
Our propane tank sits in that bin. However, there is also plenty of room for us to store our sewer hoses and clean-up kit there.
If you have extra water containers or a poop caddy, this would be a great place for them to be mounted as well.
Power and Water Management Tips
If you are boondocking or camping off-grid on a regular basis, then power and water management are something that you need to consider for your campsite setup.
Water Management
So another thing about having a small Teardrop Trailer is having smaller holding tanks for water and waste.
This is not really an issue if you are only camping for a weekend, or if you are parked at a full-service site.
However, if like us, you mostly visit provincial parks with electric sites, then water management becomes a concern.
With our style of camping (so far) we really have not needed to deal with too much in the way of water management.

We can make our tank of water last for the whole weekend, even when the kids are with us.
We often do this by filling our dishwashing buckets with water from the campground taps rather than from the camper.
In the future, we would like to try boondocking, so we will need to carry extra water containers and possibly a honey wagon.
Power Management
Again, if you tend to camp at fully-serviced (or even just electrical campsites) only, this won’t be an issue for you.
When we camped at Bruce Peninsula, our site was not powered. We were hoping to rely on our lithium battery and our solar panels to keep us going for the long weekend.
That didn’t go well! Even though our site said mostly sun, this was not the case for the parking pad (only the main part of the campsite).

As a result, our solar panels were not able to recharge our battery.
We are now thinking of purchasing a portable generator for times when we are boondocking or at unserviced sites.
Just keep in mind, that a generator may not be allowed in every campground.
Another option would be to have a small portable solar panel that could be moved into the sun.
This is what our neighbours in Bruce Peninsula had for their Teardrop (which didn’t have any solar panels).
Safety and Security Essentials
Campsite security is something we should always consider when we are camping. This is true both for our actual trailer and for the campsite in general.
Trailer Security
One of the downsides to owning a Teardrop Trailer is that they are much easier to steal.
Because of their size, almost any vehicle can tow them away. That, and their size also makes it easy for anyone to manage them (I don’t think I could easily maneuver a large fifth wheel through tight campground roads).

Because of this, we spared no expense in getting as many security gadgets as possible.
Once again, we have an entire blog post covering our security items. From wheel locks to hitch and chain locks, we cover it all.
At the end of the day, if someone wants to take the trailer, they will. But at least we can make it as difficult as we can for them!
Campsite Security
Once again, if a thief wants something, we want to make it as difficult as we can for them to get it.
We ALWAYS lock our camper, including the ‘garage,’ and close our windows when we leave our campsite for an extended period of time (like going to the beach or for a hike).
We also lock any valuables or gear in our tow vehicle. If we have our bicycles with us, they get locked up as well.
Those examples are for the human thieves! Wildlife is another concern altogether!

We make sure that all of our garbage, dishes, food, and anything that’s food-scented (like dirty dishes or BBQ utensils) are locked away in our camper or tow vehicle.
On one occasion, John made the mistake of forgetting about a small trash bag with food scraps hanging in our dining tent.
When we got back, the squirrels or chipmunks had managed to get under the tent, scale the screening and pull down the bag. What a mess!
Another time, we were finishing up dessert around the fire, when a cheeky raccoon swooped in and stole a large trash bag off our picnic table. The bag was less than three feet from where we were sitting!
At least we weren’t in bear country!
Personal Touches to Make It Your Own
This is one of my absolute favourite parts of campsite setup – making it my own!
I love to bring seasonal decorations, a flag, match the colour of our lights to the season or occasion, have a sign for our campsite, and even change the decorations inside the camper seasonally.

We have seen people bring houseplants, seasonal inflatables (we have one for Halloween), and all kinds of items to make them feel at home.
It really is a lot of fun and a great way to let your creativity and personality shine through!

Final Thoughts
Well, there you have it!
All of our suggestions for the perfect campsite setup, from the selection of an amazing site to your finishing personal touches.
What you choose to buy and how you choose to set up your site really depends on the type of camper that you are.
And don’t forget, it’s really easy to adjust and perfect your setup over time to meet your needs.
Do you have any favourite RV campsite setup ideas that you would like to pass along? Drop us a line, we’d love to hear about them!
Pin This Post for Later!

Related Posts:
- How to Winterize Your Teardrop Trailer in 10 Easy Steps (With FREE Checklist)
- The Ultimate Guide to Camping with Your Dog
- Best RV Campsite Setup Ideas for Your Teardrop Trailer
- Ultimate RV Departure Checklist for Teardrop Trailers
- Ultimate RV Arrival Setup Checklist for Teardrop Trailers
- How to Level a Travel Trailer & Why It’s So Important
- Top 15 Tips for Towing a Teardrop Trailer with Your Family Car
- How to Dewinterize Your Teardrop Trailer
- How To Use an RV Dump Station for the First Time
- How to Book an Ontario Provincial Park Campsite – An Ultimate Guide
- How to Book a Parks Canada Campsite – An Ultimate Guide
- Camping with A Teardrop Trailer – How to Plan the Perfect Trip
